Spring에서 모든 호출은 DispatcherServlet을 통과하게 되고 이후에 각 요청을 담당하는 Controller로 분배된다.
이때, 각 요청에 대해서 공통적으로 처리해야 할 필요가 있을 때
DispatcherServlet 이전에 단계가 필요하며 이것이 Filter다.
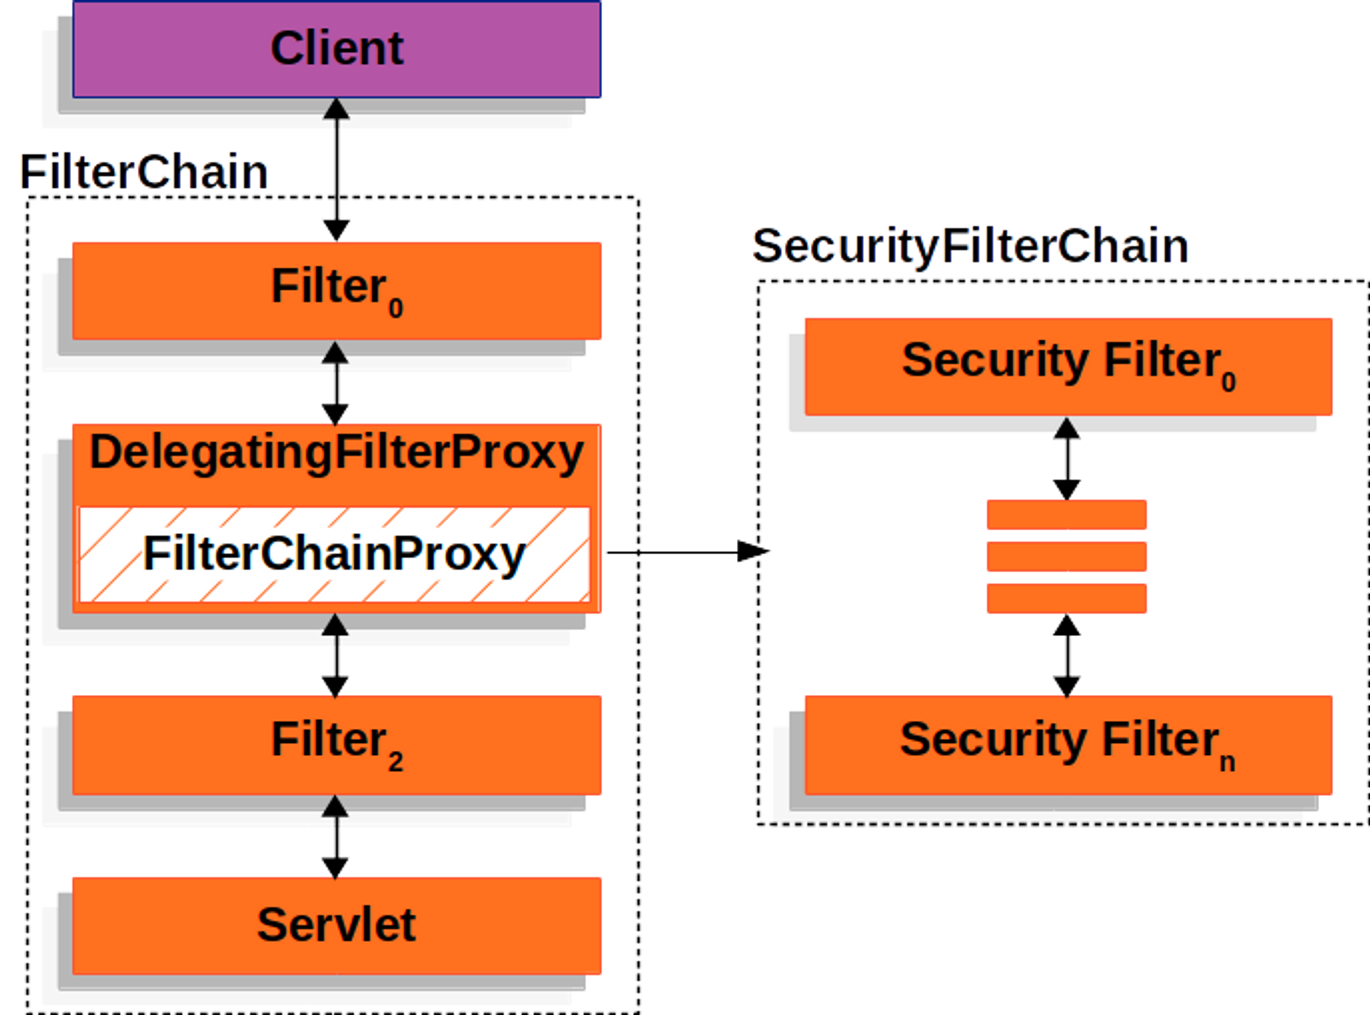
Spring Security도 인증 및 인가를 위해 Filter를 사용하며 FilterChainProxy를 통해서 상세로직을 구현한다
Spring security에서 제공하는 인증방식: Form login
Form Login 기반 인증: 인증이 필요한 URL 요청 시 인증되지 않았다면 로그인 페이지를 반환하는 구조
내부에서 인증을 처리할 때 가장 많이 사용되는 방식으로 usernamePasswordAuthenticationFilter가 있다.
usernamePasswordAuthenticationFilter 동작 방식
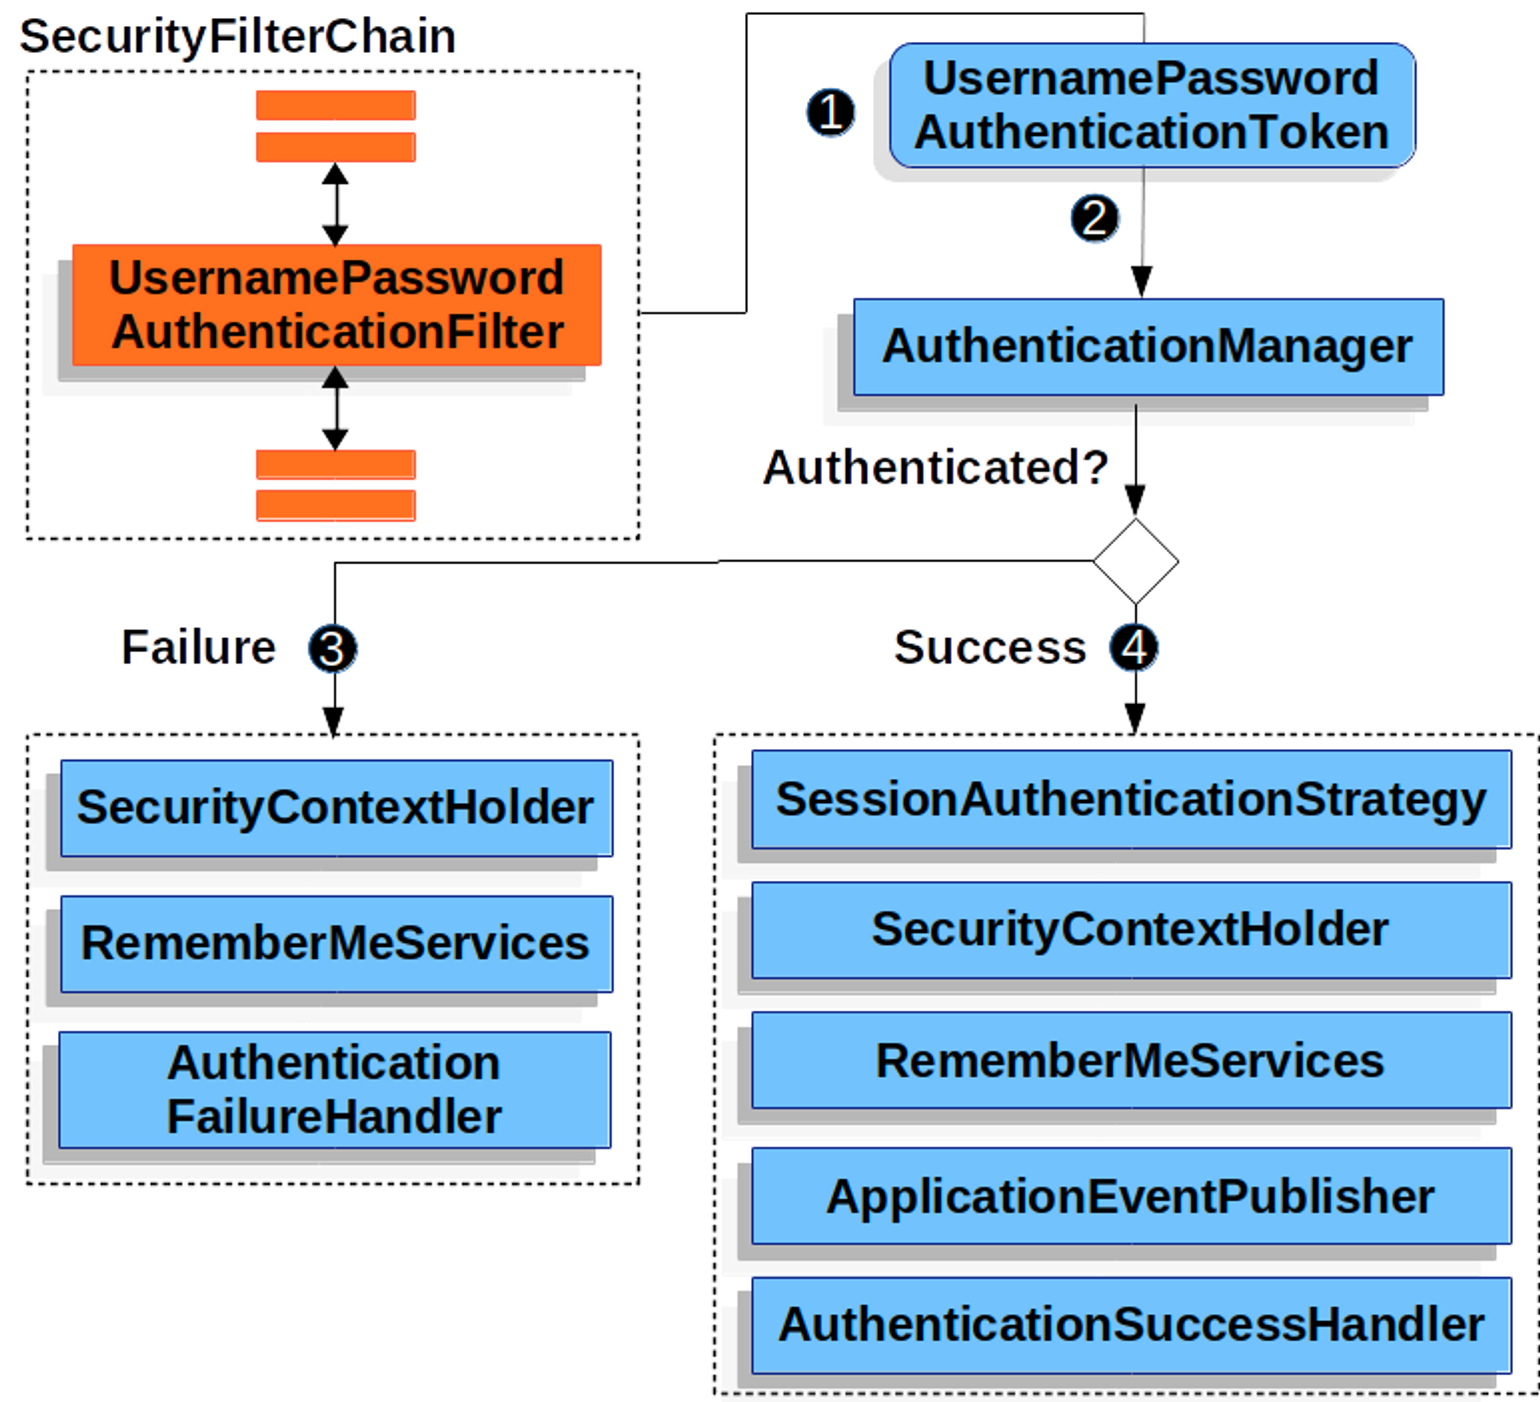
1. 클라이언트가 SecurityFilterChain으로 유저네임, 패스워드 전달
2. SecurityFilterChain가 usernamePasswordAuthenticationToken 생성
3. AuthenticationManager에게 토큰 전달. 매니저는 인증을 시도함
4-1 성공 시: SecurityContextHolder에 usernamePasswordAuthenticationToken 저장
4-2 실패 시: SecurityContextHolder를 비운 후 loginpage로 redirect
SecurityContextHolder
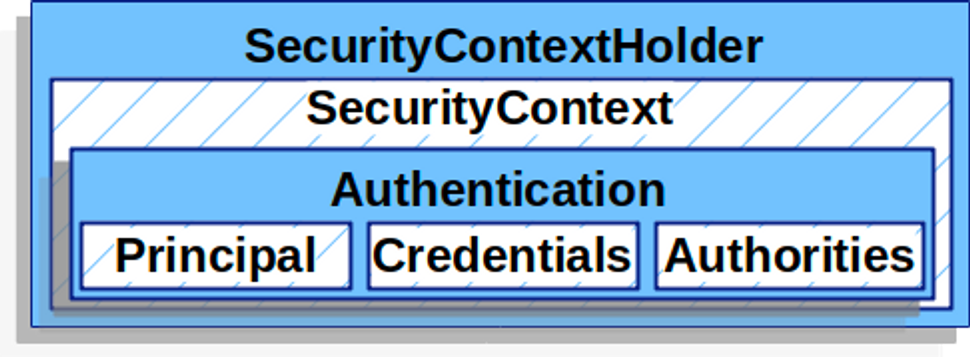
- SecurityContext는 인증이 완료된 사용자의 상세 정보(Authentication)를 저장하는 공간이다
- SecurityContext는 SecurityContextHolder 로 접근할 수 있다.
예시코드
SecurityContext context = SecurityContextHolder.createEmptyContext();
Authentication authentication = new UsernamePasswordAuthenticationToken(principal, credentials, authorities);
context.setAuthentication(authentication); // SecurityContext 에 인증 객체 Authentication 를 저장

SecurityContextHolder.setContext(context);
- Authentication
- 현재 인증된 사용자를 나타내며 SecurityContext에서 가져올 수 있다.
- principal : 사용자 식별
- Username/Password 방식으로 인증할 때 일반적으로 UserDetails 인스턴스이다.
- @AuthenticationPrincipal 을 사용하여 가져올 수 있다.
- credentials : 주로 비밀번호, 대부분 사용자 인증에 사용한 후 비운다.
- authorities : 사용자에게 부여한 권한을 GrantedAuthority로 추상화하여 사용한다.
    <UserDetails>
    @Override
    public Collection<? extends GrantedAuthority> getAuthorities() {
        UserRoleEnum role = user.getRole();
        String authority = role.getAuthority();

        SimpleGrantedAuthority simpleGrantedAuthority = new SimpleGrantedAuthority(authority);
        Collection<GrantedAuthority> authorities = new ArrayList<>();
        authorities.add(simpleGrantedAuthority);

        return authorities;
    }

    Authentication authentication = new UsernamePasswordAuthenticationToken(userDetails, null, userDetails.getAuthorities());
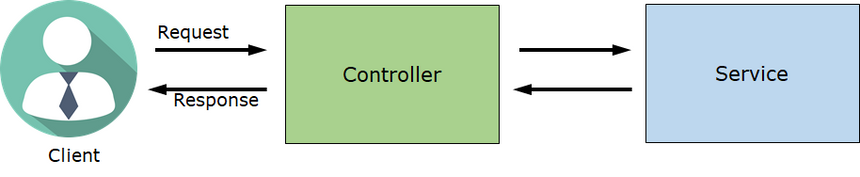

security는 Controller가 실행되기 전 먼저 실행하기에 보안적인 측면과 속도 측면에서도 훨씬 좋다.
security 코드 예시
        // 로그인 사용
        http.formLogin((formLogin) ->
                formLogin
                        // 로그인 View 제공 (GET /api/user/login-page)
                        .loginPage("/api/user/login-page")
                        // 로그인 처리 (POST /api/user/login)
                        .loginProcessingUrl("/api/user/login")
                        // 로그인 처리 후 성공 시 URL
                        .defaultSuccessUrl("/")
                        // 로그인 처리 후 실패 시 URL
                        .failureUrl("/api/user/login-page?error")
                        .permitAll()
        );
예제코드 - security를 사용하지 않았을 때 인증 및 권한부여
 if ( ... ) {
            // 인증이 필요없는 기능들은 바로 요청 진행
            } else {
            // 나머지 요청은 인증 처리 진행
            // 토큰 확인
            String tokenValue = jwtUtil.getTokenFromRequest(httpServletRequest);
            if (StringUtils.hasText(tokenValue)) { // 토큰이 존재하면 검증 시작
                // JWT 토큰 substring
                // 토큰 검증
                // 토큰에서 사용자 정보 가져오기
                );
    // 다음 Filter 로 이동
            } else {
                throw new IllegalArgumentException("Not Found Token");
            }
        }
    }
security 사용 시 인증 및 권한부여
http.authorizeHttpRequests((authorizeHttpRequests) ->
                authorizeHttpRequests
                        .requestMatchers(PathRequest.toStaticResources().atCommonLocations()).permitAll() // resources 접근 허용 설정
                        .requestMatchers("/api/user/**").permitAll()    //**: 전부라는 의미
                        .anyRequest().authenticated() // 그 외 모든 요청 인증처리
        );
Spring security 사용법
1. gradle의 dependencies 구현
implementation 'org.springframework.boot:spring-boot-starter-security'
2. 사용할 클래스에 Spring Security 지원을 가능하게 하는 @EnableWebSecurity 작성
(세션방식으로 동작. 기본 default 로그인도 지원한다)
'Springboot' 카테고리의 다른 글
| [Springboot] 관계 매핑(ORM; Object Relational Mapping) N:M (0) | 2023.07.07 |
|---|---|
| [Springboot] Security (0) | 2023.07.01 |
| [Springboot] login 구현 (0) | 2023.06.29 |
| [Springboot] @Valid (0) | 2023.06.28 |
| [Springboot] PathVariable vs RequestParam (0) | 2023.06.23 |